
Z31 Replacing Your Switch Pod Lamps
The Z31 300zx has many small bulbs that are hard to locate and replace. One of these is the switch pod bulbs. Here is the process to replace them.
- Phillips Screw Driver
- Flat head Screw driver
- Ratchet
- 10mm Socket
Tools Needed:
- Nissan part # 25170A
Parts Needed:
- Take the lower panel on the drivers side off. This will be held on with 3 phillips head screws.
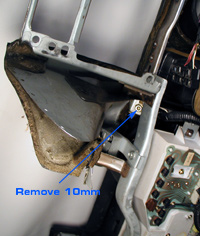
- Now lay on the floor and take a 10mm socket and short extension for the left side and a 10 inch extension with a universal joint for the right. There is 1 nut on each side to remove the entire switch.
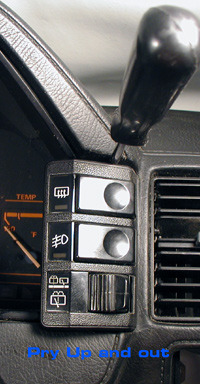
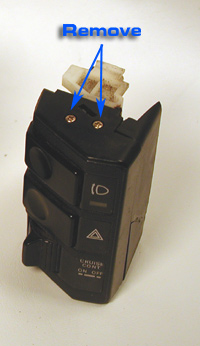
- Once you've got the nut off take a flat screwdriver and slide it in the top part of the switch and press downward and slowly pull the switch out as far as the wires will allow.
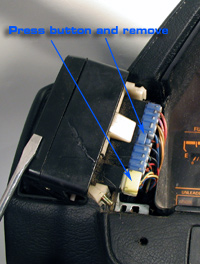
- Push on the appropriate electrical connector and slide the connector out of the switch.
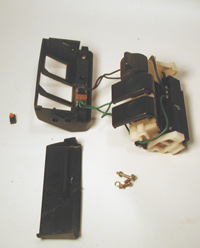
- Once the switch is out, remove the finisher panel by popping it loose.
- Remove the three screws from the top and bottom and pull the whole electrical switch out.
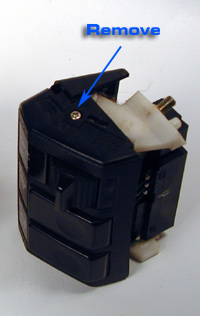
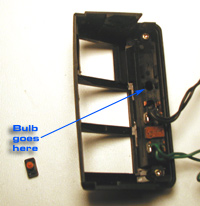
Now you can get at the 2 screws that hold it together. GL and GLL cars have different bulb cover colors depend on what model car you have. GL have orange bulb covers and GLL has green, Latter years have no bulb covers. You will need to correct bulb with the cover as there are 4 different ones available. - Once you remove the 'T' shape bulbs by pulling them off the electrical leads you will see what color you need.
Assembly is the reverse of Disassembly.
Process:
NOTE: A local Nissan dealer can get the bulb you need. It is best to bring your old one in to match them up as they are getting harder to find and even with the part number mistakes have happened.