Z31 GLL to GL Steering Wheel Conversion

One of the best things you can do to a GLL's interior (IMO) is to get rid of that ugly steering wheel. I chose to go with a GL steering wheel. The process I used involves cutting a wire that is necessary to use have the horn work on the GLL steering wheel, if you EVER think you may want to go back to the GLL wheel, DO NOT DO IT THIS WAY! I'll tell/show here the procedure to install it if you do not wish to keep the cruise. I had removed the cruise from my car. If you wish to keep the cruise and use this steering wheel, you'll need the cruise switches from a GL car, and to figure out how to install that stuff on your own with help of the FSM found here.
Tools Needed
- Phillips head screw driver
- 10mm socket /w ratchet
- 19mm socket /w ratchet
- Steering wheel puller
- Wire cutters / crimpers
- Knife
- Soldering Iron
Parts Needed
- GL Steering wheel
- GL combination switch assembly (light switch, wiper switch, and cruise switch)
- GL column plastics (cannot reuse GLL, screw locations are different and is not cut out for cruise switch)
- Cruise switch harness (car end. Can be cut, just save enough wire to solder new wire to). *This is optional, makes for quick removal of combination switch in the future.
- 2 1N4001 diode Diodes
- Wire (enough to extend each wire from cruise switch (5 in total) to ASCD controller in drivers kick panel)
- Solder
- Electrical tape/Heat shrink
- Blue Female connector (you can buy a ton of them at a parts store for a few bucks)
The Process
- I recommend you disconnect your battery, because you'll be dealing with electrical components.
- First you want to remove the steering wheel column covers. To do this, there are 4 Phillips head screws that hold this all together. The outer two hold the halves together and the inner two hold the cover to the combo switch. Now remove the key light connector and the cover will be free. Be careful not to crack the cover when pulling the lower half over the cruise control switch on GL models.
- Now you can pry the horn cover off the steering wheel with your hands. To do this start at the top and pull. You will now see the 19mm nut that holds the wheel to the shaft. Remove this nut and use a steering wheel puller to remove the wheel. Another way to remove this without the puller is to loosen this nut but leave it on about 3 turns. Now shake the wheel side to side and top to bottom. It will come loose and the nut is still there to keep the wheel from hitting yourself in the face with it.
- Now that the steering wheel is removed, you'll see the slip ring on the GLL model. Unplug the connector from it, then it should just slide off the steering column. The GL does not have this.
- With the slip ring removed, you should see the Switch Mount that the turn signal switches and wiper switches screw onto. You'll need to remove the 4 screws (2 per switch). With the screws removed, the switches should slide right out the side without needing to unplug them.
- Loosen the clamp on the back side of the switch mount and slide it off the steering shaft.
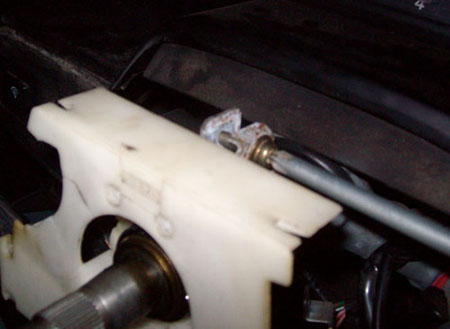
- With that one out, you can now proceed to get the one from the GL. Don't be like me and drop it, because it does not like 3 foot falls...luckily, mine didn't break anywhere important, so I could still install it properly. Slide it onto the steering column, and MAKE SURE the clip goes into the hole in the column. If it doesn't, you WILL push it to far, and your horn won't work.
- Tighten the clamp on the back of the switch mount and Re-install the switches into the side of the GL switch mount, Dont forget to install the 4 screws for the switches.
- Now you'll need to wire up the horn. Remember that plug you unplugged from the slip ring? Cut the SOLID black wire, and strip the end. Now install the Female Spade connector.
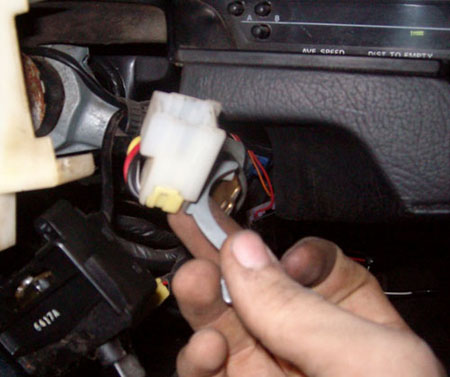
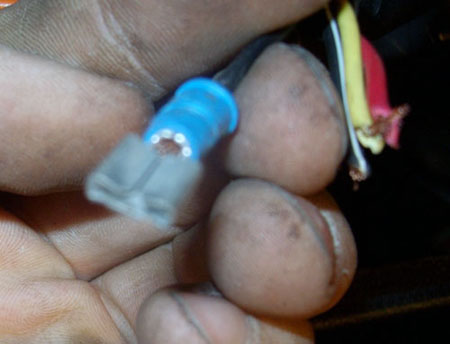
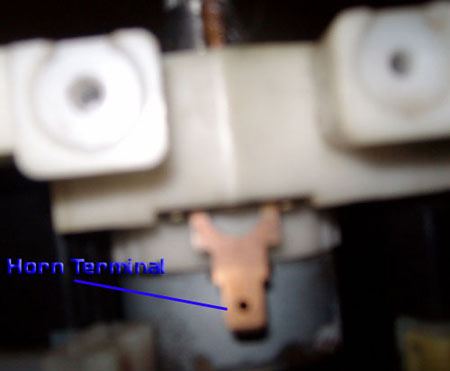
- Plug the connector into the back side of the switch mount, onto the male plug for the horn button.
- Next, remove the ASCD controller. It is tightly tucked away just above the fuse panel. Have a look at the FSM if you are having trouble finding it.
- Now you can extend each of the cruise switch wires down to the ASCD controller. Splice each of your wires into the controller wiring as shown in the diagram below. You can cut the wires (except for the stop lamp wire and pin 14 wire) and connect them directly to the cruise switch if you wish, I chose to splice just in case I decided to go back to the GLL wheel in the future. All changes to the wiring are shown in red:
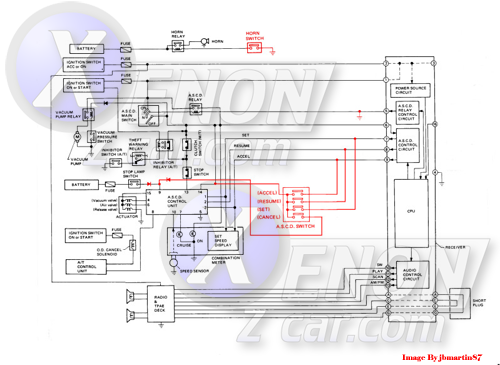
- Normally, in a GL, the cancel wire would be connected to pin 11 on the ASCD controller. The pin is there on the GLL but there is no wire in the harness, so I chose to use the stop lamp wire instead. The diodes are added so that, when using the cancel button, the brake lights will not come on and to prevent power from the brake lights from feeding back into the ASCD controller.
- Finally, you need to ground pin 5 of the steering wheel receiver. Refer to your FSM for receiver location, it is under the luggage box in 2 seater models but I am unsure of the location in a 2+2. Pin 5 needs to be grounded so that the cruise pilot light and relay will stay on when activated.
- Install the GL steering wheel. Simple slide it over the steering column (CENTERED) and onto the spline, then re-install the 19mm nut. Torque specs for this is 36 to 43 ft lbs
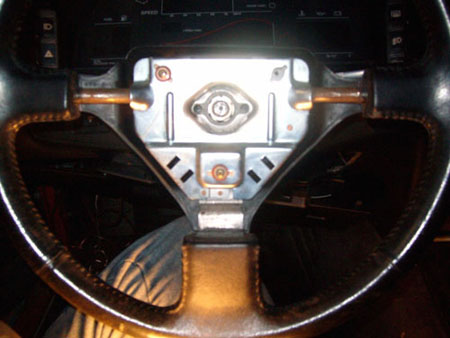
- Hook up the battery, and test the horn. If you did everything properly, it should work.
- Reinstall the steering column covers and clean your Interior and you are done.
