
Z31 Dash Warning Lamps
Here you will find information on the Dash Warning Lamps and what they mean.
Lamp Chart
| Image | Lamp Name | Description |
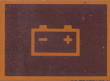 |
Charging System | This light usually means the alternator is not charging correctly. When this happens a few of the other lights come on at the same time. Simply replace the alternator. Be sure you have the auto parts store test the old alternator first and the new one before you leave the store as many are DOA. The voltage regulator is internal to the alternator |
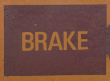 |
Brake System | When this light is on, the fluid level in the master cylinder is low. This usually happens around the time you need new brake pads. The master cylinder is designed so that when you have brand new pads, and the level is full, that you can run your pads to minimum thickness and just touch the low mark. Of course, this light also could mean your parking brake is on. If you have full fluid, check the fluid level switch. Simply unplug the connector that is located on the side of the master fluid resevoir. If the light goes out, the switch is stuck. Clean or replace the switch. If the light stays on, the pin switch in the parking brake may have lost its contact point. Replace the stopper for the pin switch. |
 |
Cooling System | When this light is on the Coolant level in the overflow bottle is low. Fill the overflow bottle with coolant. If you have coolant in the bottle, the switch is stuck. Remove the whole overflow bottle and clean with some CLR (calcium, lime, rust) remover. |
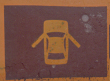 |
Door Warning | When this light is on one of the doors is open. It could be either driver or passenger door or the rear hatch. If all are closed the door switch may be broken. |
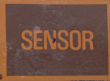 |
O2 sensor | This Lamp comes on every 30,000 miles. Check and replace (if needed) the oxygen sensor. Then reset the sensor light. To do this Drop the glovebox door by pressing in the sides releasing the door stops from their holes. Remove the screws (4 trim/2 latch). Pull the box out and lower it out of the way. At the top of the glovebox frame slightly to the left locate a relay. On the right side of the relay you'll feel a rubber-covered button/plunger. Press it in and you'll hear the relay spring reset. Turn the ignition switch on, the sensor light should be off. Reassemble. After 90,000 miles you disconnect the light. Remove the panel just below the steering wheel. On the left you will see a group of wires taped together going into a wiring harness. Taped to this group of wires will be another wire (green/yellow I think) with a plug (white plug) - this is the wire for the sensor light - unplug it. |
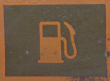 |
Fuel Warning | When this lamp is on the fuel level is low. This light usually comes on with about 3 to 5 gallons of gas left in the 19 gallon tank. |
 |
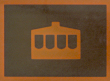
Lighting System 86+ | When this light is on, one of either Head lamps, Brake lamps, or Tail lamps are our. Replace burnt out lamp. If all tail lights and head lamps are functioning, then there is a problem with the tail light or Headlamp sensors |
 |
Head Lamp 84-85 | When this light is on, one of the Head lamps is out, Replace lamp. If both head lights are functioning, then there is a problem with the head light sensor. |
 |
Tail Lamp 84-85 | When this light is on, one of the Tail lamps or brake lamps is out, Replace lamp. If all tail lights are functioning, then there is a problem with the tail light sensor |
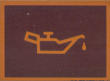 |
Oil Pressure | When this lamp is on, the oil pressure is reading low. This Can happen if the oil level is low or if the Oil pressure sending unit harness gets disconnected. Also the Oil pressure sending unit is known to go bad giving false readings. |
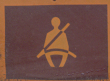 |
Seatbelt Warning | This flashes for a few seconds when you first turn the car on to remind you to fasten your seat belt |
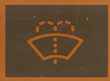 |
Washer Level | When this lamp is on, the windshield washer fluid is low. If the fluid is full the sensor can be stuck. Clean again with CLR |