


S130 Refreshing Your Air Flow Meter
⚠️ Warning:
This may seem like a simple and straightforward procedure, however, there is always the possibility of error, and you are responsible for any damage you cause by attempting this procedure yourself. It is fairly easy and can make a world of difference in your car's driveability, but your results may vary. Some Air Flow Meters may not need any recalibration or adjustment whatsoever, but this tutorial shows what would be done if you were paying to have your AFM rebuilt.
Items Needed
- Electrical Cleaner
- Small Flathead Screwdriver (One from an eyeglass repair kit will do.)
- Dielectric Grease
Locating The AFM
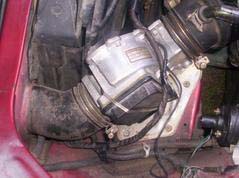
If you don't know where your AFM is, chances are you shouldn't even be attempting this procedure, but if you insist, it's located in the left front side of your engine compartment and looks something like this:
Clean Your AFM
This may not be the most fun, but your AFM is more than likely more than 2 decades old and chances are it hasn't been so much as wiped out in that entire time. That would be a rather significant layer of buildup in there, and no doubt has to be adversely affecting your performance. There is a small plastic piece protruding from the side - this is your Air Temperature Sensor; be sure it's clean and free of buildup, but be sure to refrain from damaging it. A cloth or paper towel should be sufficient for cleaning the internals of your AFM, but if more is needed, brake cleaner is useful for its lack of greasy film and quick evaporation. Be sure to wipe any excess cleaner away, regardless.
Cleaning Your Connectors
This sounds like something silly, but it could possibly be one of the most important parts of the entire procedure. A dirty or corroded connection could very well be the cause of your AFM problems, and many a person has needlessly opened up their AFM when all they needed was to clean their connections. This may or may not take a lot of time, it varies depending on how horribly corroded and dirty your connectors are.
The first thing you need to do is locate the connector on the underside of the AFM. If you removed the AFM from the car, the harness connector should be easy to find. Spray down the connectors on both the AFM and the harness with just enough cleaner to soften the corrosion. Let the cleaner soak for a moment, then grab your flathead screwdriver and start scraping that corrosion off of the connectors. Give another squirt of the cleaner and let it dry, then use a paper towel or cloth to clean off any remaining debris. Set the dielectric grease aside - you'll need it later.
Opening the AFM
Now comes the "fun" part: getting the AFM case open. It's not insanely difficult, just avoid gouging yourself while trying to open it. You can use a flathead screwdriver, a razor blade, or whatever else you find suitable for the task. The lid is held in place by a silicone sealant, which must be separated from the lid by inserting the tip of your screwdriver or razor blase and slide it firmly along the perimeter of the case, making sure you're cutting through the sealant and not just riding on top of it. Once you've made a couple passes around just pry the lid off with the screwdriver. This part can be stubborn but it WILL come off. These lids aren't delicate so don’t be afraid to pry, just don’t overdo it. When in doubt, cut around the edge to make sure you got all of the sealant.
Examine Your AFM
The insides of your Air Flow Meter should look something similar to the image below. Click the image for a much larger view. (429k JPG)
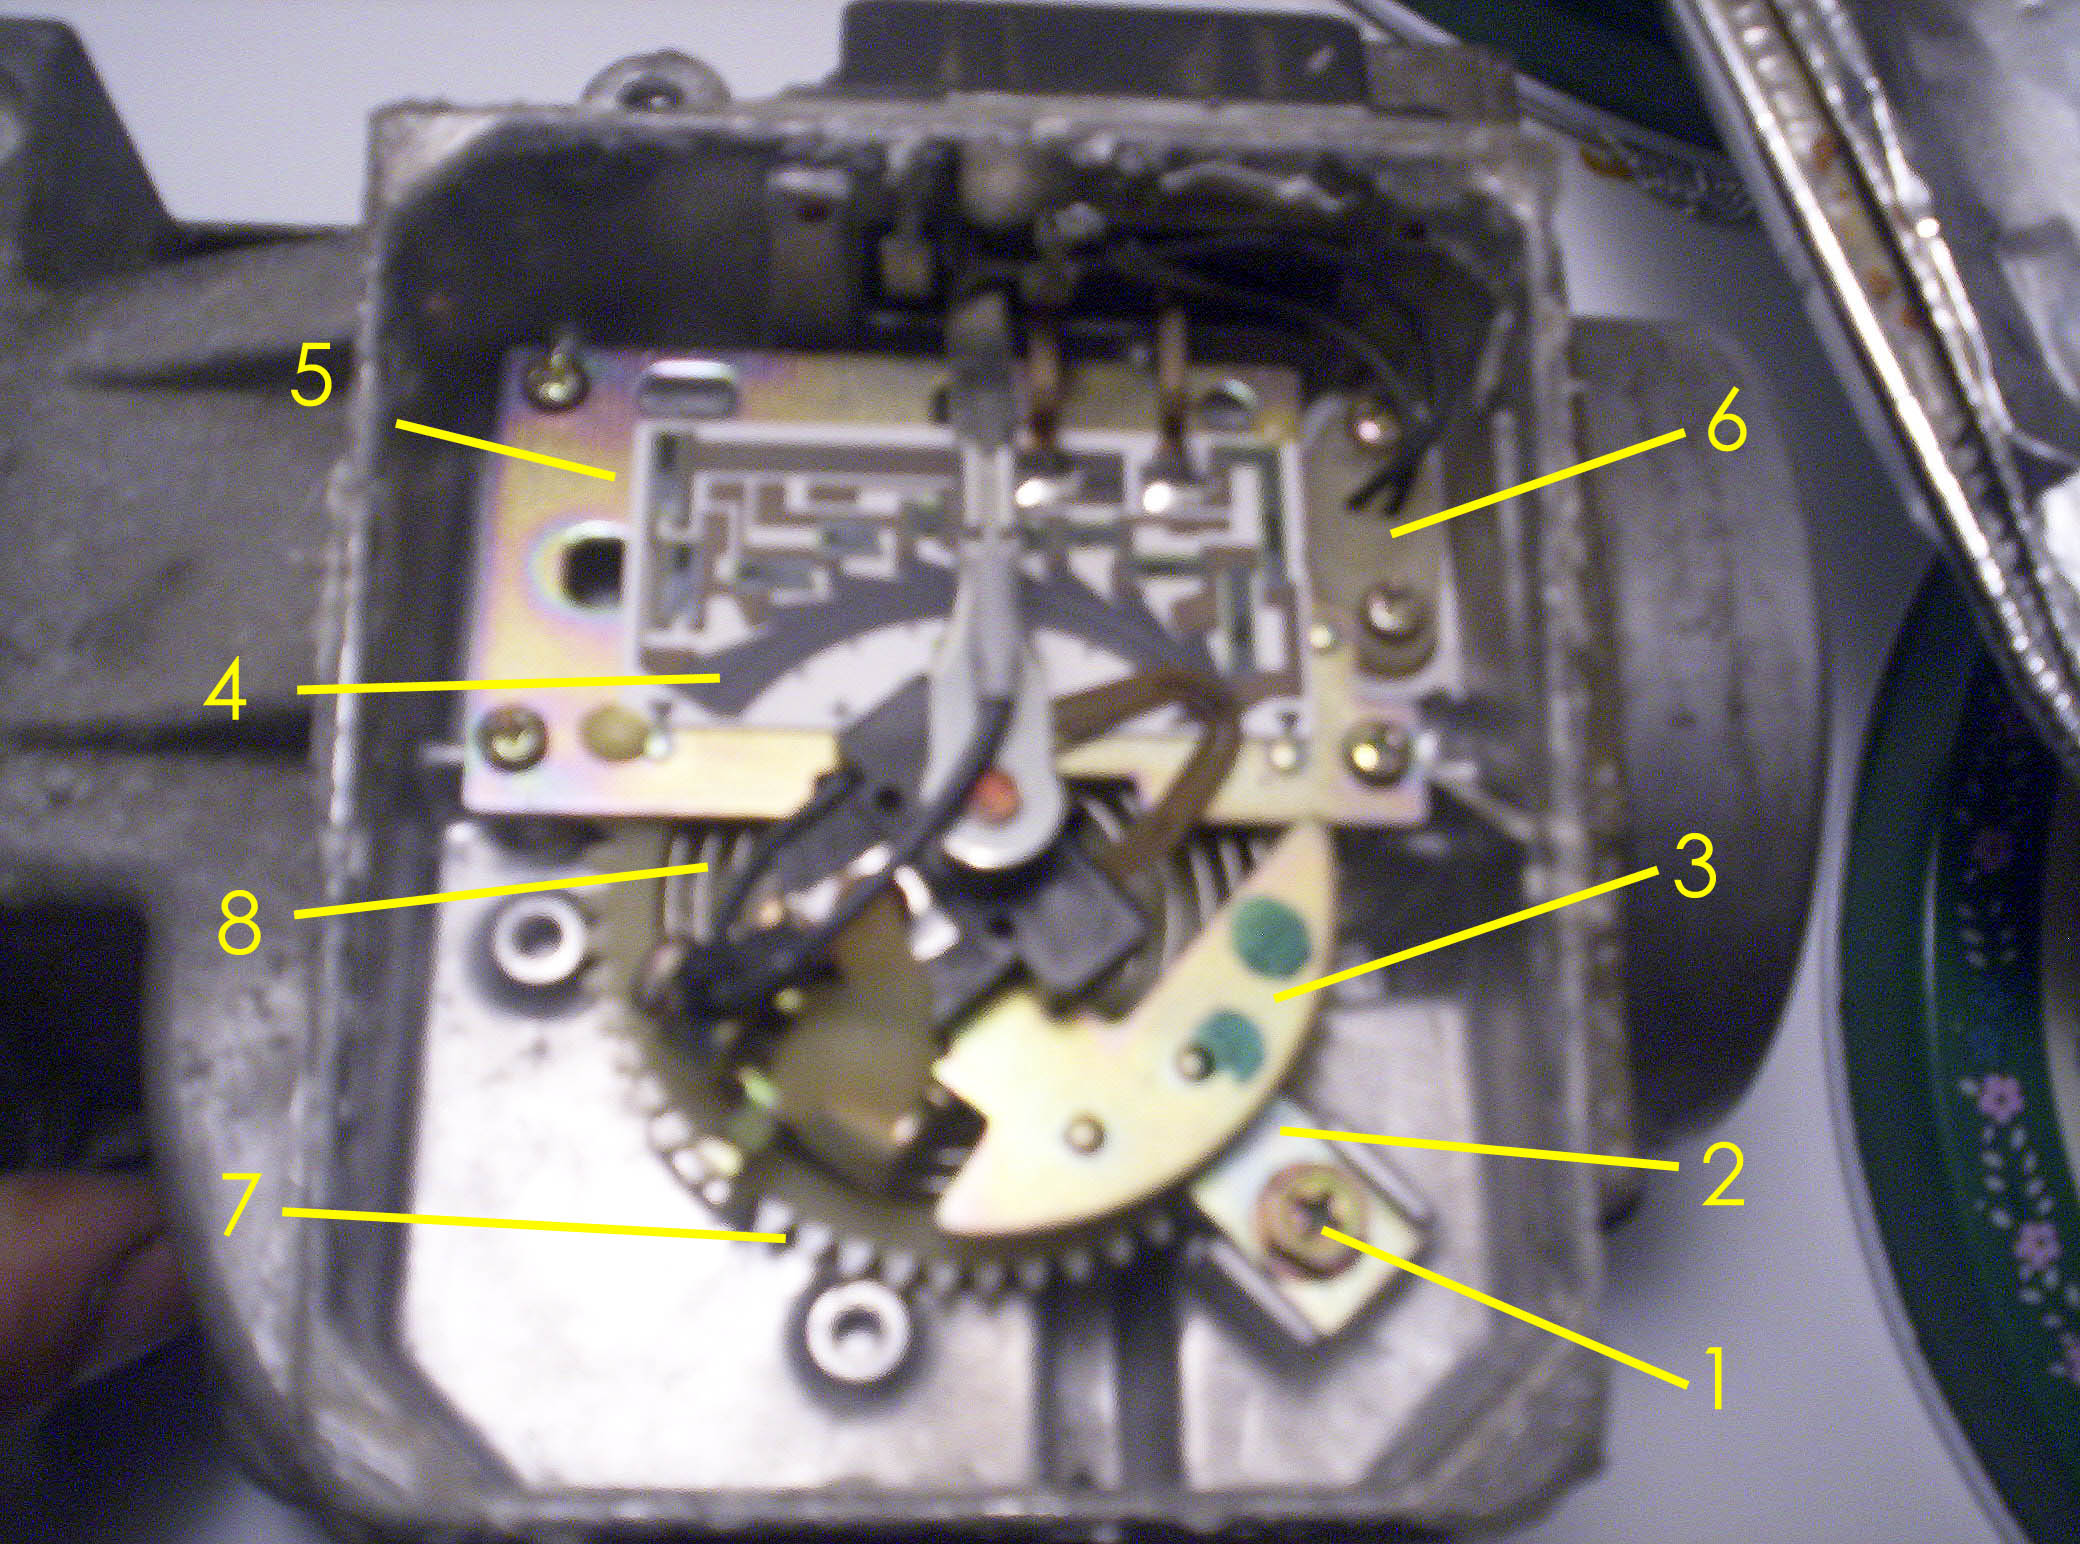
AFM Component Labels:
- Set Screw for Spring Tension Retainer
- Spring Tension Retainer
- Flapper Door Counterweight
- Carbon Track
- Circuit Plate
- Air Temperature Sensor
- Spring Tension Adjuster Cog
- Flapper Door Tension Spring
Adjusting The Carbon Track
If you examine your Carbon Track, you’ll likely notice two grooves worn into it by the swiper arm over time. The Carbon Track is a resistance field, and the swiper arm slides along it, sending a signal to your ECU based on position and resistance to determine the flapper door's location.
Over time, those parallel grooves can cause the arm to lose proper contact, changing the resistance and sending a faulty signal to the ECU—negatively affecting drivability. To fix this, we’ll give the swiper arm a fresh section of carbon track by slightly moving the circuit plate—even 1mm is enough to make a difference.
Adjustment Steps:
- Loosen the 3 screws holding the circuit plate slightly—do not remove them.
- Push the plate upward toward the casing (without side-to-side movement).
- Move the plate just enough so the swiper arm no longer runs in the grooves (less than 1mm).
- Swing the swiper arm through its full range, ensuring it never intersects old grooves or leaves the carbon track.
- Tighten screws securely after confirming correct alignment.
Tip: If you can’t move the plate far enough up, try moving it down. If that’s still not enough, slightly enlarge the screw holes with a file. Proper side-to-side alignment of the carbon track is more important than top-to-bottom.
Once adjusted, reinstall the AFM into your car. You can stop here or proceed with the following procedures.
Now’s the time to use your dielectric grease—apply it to electrical connectors to seal against moisture, prevent corrosion, and ensure reliable AFM operation. If you don’t own an air/fuel ratio gauge, avoid proceeding further unless you’re confident in air/fuel tuning, as the next steps adjust the mixture.
⚠️ Performing the following procedures is done at your own risk.
Adjusting the Idle Mixture
The Idle Mixture Adjustment Screw is located on the lower side of the AFM near the inlet, as shown below.
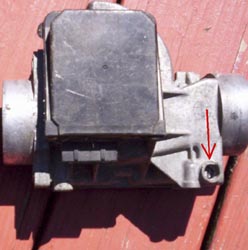
Not all AFMs have this screw. All non-turbo models should, but some turbo models may not. If your AFM does not have the screw, simply skip this step.
The screw meters the amount of air that bypasses the AFM. This only affects the air/fuel ratio at idle. The principle: while the flapper door signal tells the ECU that only “X” amount of air is entering, the mixture screw allows a small extra amount to bypass — leaning or enriching the mixture depending on screw position.
Note: The screw is often covered by a plug. On older AFMs, this plug is usually missing. If it’s still there, simply pop it out to access the screw.
Adjustment Directions:
- Clockwise = richer (less air bypass)
- Counterclockwise = leaner (more air bypass)
Turning the screw clockwise closes the air passage, letting less air through, resulting in a richer mixture. Turning it counterclockwise opens the bypass, letting more air through, creating a leaner mixture. For best results, use an air/fuel ratio gauge when making these adjustments.
Flapper Door Tension Adjustment
This modification can improve throttle response by reducing the force needed to open the flapper door, but it can also negatively affect performance if done without an air/fuel gauge. The AFM’s spring tension is factory-calibrated, and changing it alters the air/fuel mixture except at wide-open throttle (WOT). At WOT, the flapper door is fully open, so spring tension no longer matters.
What the Adjustments Do:
- Lightening Spring Tension: Richens the mixture. Less force is required to open the flapper door, so the ECU thinks more air is entering and adds extra fuel — resulting in a richer mixture.
- Strengthening Spring Tension: Leans the mixture. More force is required to open the door, so the ECU thinks less air is entering and adds less fuel — resulting in a leaner mixture. WARNING: Never lean the mixture below factory settings without an A/F gauge. Lean conditions can cause severe engine damage.
Tools Needed:
- Phillips screwdriver
- Permanent marker
First, make two reference marks with your permanent marker — one on each side of the tension spring retainer. This will allow you to return to the factory setting if needed.
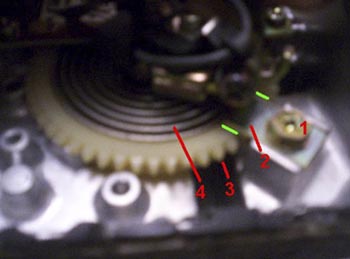
Adjustment Steps:
- Break the retainer screw loose (may have glue from the factory), but do not fully loosen it yet.
- Secure the tension spring cog in place — never let it spin freely or the spring will unwind completely.
- Loosen the retainer screw enough so the cog can turn.
- To lighten tension: Let the cog turn itself slowly. To tighten tension: Turn the cog against the spring force.
- Tighten the retainer screw once the desired adjustment is made.
- Check air/fuel ratio at different RPMs to confirm proper tuning.
- Seal up the AFM once satisfied.
Done correctly, this adjustment can improve driveability, but proceed with caution — incorrect settings can harm performance or engine health.