


Z31 Heating and Air Conditioning Refreshing
The HVAC system in my 300zx was in pretty bad condition. The heater core leaked, the AC blows only warm air, and the temperature reading is often inaccurate. I decided, since I have to replace the heater core, I might as well completely renovate the entire HVAC system. I have included heater box renovation, duct repair, sensor repair, etc on this page. Again, if anything is missing, please feel free to contact me.
Items needed
- Spray enamel (flat black)
- Open cell foam weather stripping (3/8" wide x 3/16" thick)
- Number 3 steel wool
- Silicon spray lubricant
- Multi-purpose grease
- High temp engine enamel (cast aluminum)
- Metric o-ring
- 5 minute epoxy
- Soldering iron
- Rosin core (60/40) solder
- Ohm meter
Access the heater box
The heater core on my 300ZX was leaking substantially. To replace it, the entire dashboard must be removed.
- Remove the dash from the vehicle (Refer to the dash removal section for procedure).
- Remove the HVAC ducting (Refer to the Replace your heater core procedure).
Rebuild the heater box
- If necessary, replace the flap seals within the box.
-
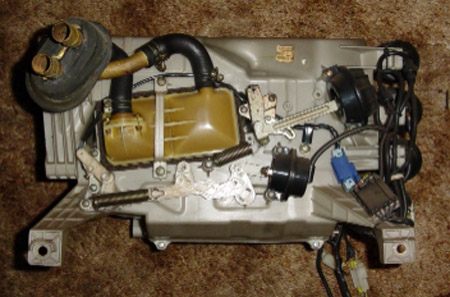
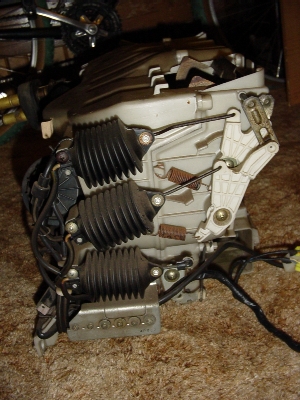
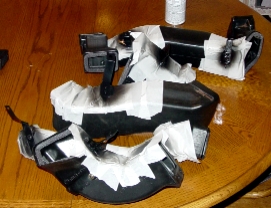
Remove the vacuum actuators from the right side of the box (see image below), including springs and vacuum manifold.
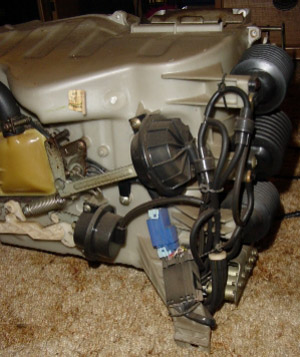
- Remove the vacuum actuators from the back side of the box, including wiring harness and sensor.
- Remove the six screws holding the two halves of the box together.
- Pull the box apart.
- Replace the internal flap seals.
- Scrape off all of the old seal.
- Sand the metal flaps with 220 grit wet-or-dry sandpaper.
- Repaint the flaps with spray enamel (Duplicolor high temperature cast aluminum engine enamel recommended).
- Replace the seals using open-cell foam weather stripping (3/8" wide x 3/16" tall).
- Lubricate all flap pivot points with a high-temp multipurpose grease.
- Reassemble the heater box.
- Replace all springs (optional, but recommended if springs are original).
- Lubricate all external pivot points with multipurpose grease.
Replace all vacuum lines
- Replace all vacuum hoses on the heater box, regardless of their condition. (This is a must—you do not want to repeat this job!)
- Remove each vacuum hose and cut a new hose to match the original length.
- Replace one vacuum hose at a time to ensure correct routing.
Refinish the cross member and cross member center support brackets
- Sand the cross member with 220 grit sandpaper.
- Paint with flat black spray enamel.
- Reinstall the cross member in the vehicle. If needed, loosen the lower steering column bolts to assist with replacing the upper column bolts.
Rebuild the HVAC ducting
- Thoroughly clean the ducting, inside and out, using dishwashing detergent.
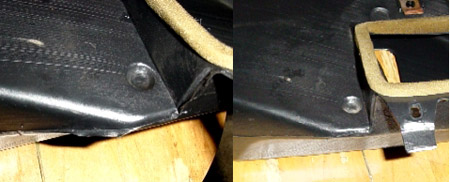
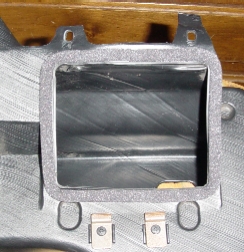
- Trim off any excess material left from the original molding process (see image above).
- Remove all traces of old weather-stripping.
- Mask the area surrounding the metal attachment brackets.
-
Refinish the metal brackets and all metal surfaces with flat black spray enamel (to match the cross member finish).
-
Apply open cell foam weather-stripping to all mating surfaces of the duct.
Sensor diagnosis and renovation
If your digital HVAC system is not working properly, refer to the Specification chart from 1984-1988 Nissan 300ZX Factory Service Manual or the Z31 Automatic Digital Climate Control Testing procedure to isolate any malfunctioning sensor. My system was functioning properly, but the sensors still needed restoration.
Final Assembly
- Reinstall the HVAC ductwork. Ensure all duct joints fit securely and are properly sealed. If needed, remove the 3/8" weather stripping and use a thicker open-cell foam for better sealing.
- Reinstall the center support brackets.
- Reinstall the dashboard.
- Test the HVAC unit to verify all positions and functions are working properly.
Sources Used
- 1984-1988 Nissan 300ZX Factory Service Manual
- Writen by: Raredare