


Z31 Rebuilding Hydraulic Lifters
Why Do Z31 Lifters Tap?
If you're reading this page, undoubtedly your lifters are tapping away at startup. Inside the hydraulic lifter used on the 300ZX, there is a small check valve—comprised of a ball bearing and a spring—which keeps oil in the lifter. As miles accrue on the engine, a buildup of sludge within the lifter can prevent this check valve from working, sticking it open.
- When open, the oil within the lifter drains out.
- This prevents hydraulic pressure from building up.
- Result: The lifter “knocks” or taps, especially at startup.
The Good News:
You usually don’t need to buy new lifters! Typically, they can be disassembled, cleaned, and filled with new oil, making them good as new. Many Z31 owners have successfully rebuilt sets—six lifters can be done in about an hour with basic tools.
*WARNING* - Do this modification at your own risk. We Are not responsable for any issues of your own doing.
Tools & Supplies Needed for Lifter Rebuild
- 3" or similar sized C-clamp: For compressing the lifter spring during disassembly/reassembly.
- 2 mm Allen wrench (or similar steel wire): A paperclip or small steel rod will work for releasing the check valve.
- Toothpicks or dental pick: For careful removal of internal components and debris.
- Heavy-duty straight 30W engine oil: Synthetic 50W can be used for extra protection (your preference).
- Paper towels: For cleanup and handling oil/parts.
- Good engine degreaser: Castrol Super Degreaser (purple) recommended for removing sludge.
- Lacquer thinner: For a final rinse and to ensure all oil and degreaser residue is removed.
Procedure
- Remove the lifters from the engine. This is the trickiest part but not difficult.
-
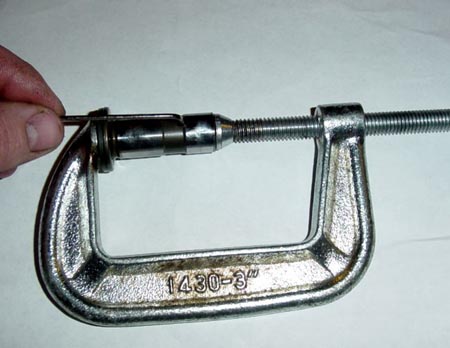
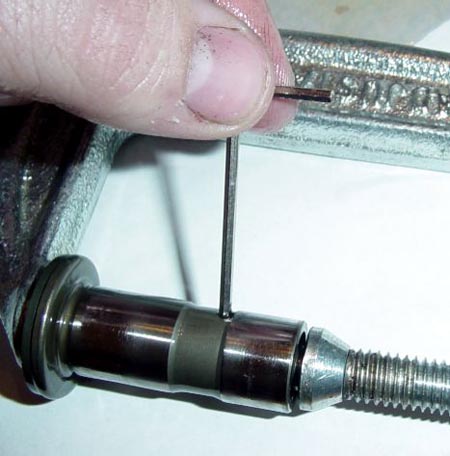
Place the lifter on a clean surface (computer paper works well). Use a large c-clamp to compress the piston into the lifter body. Insert a 2-mm Allen wrench into the hole in the lifter; if the hole doesn't line up, loosen the clamp slightly and rotate the lifter body until it does, then insert the Allen wrench.
-
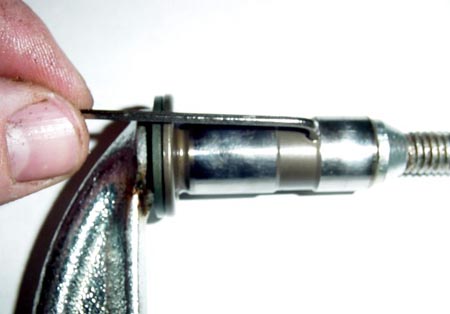
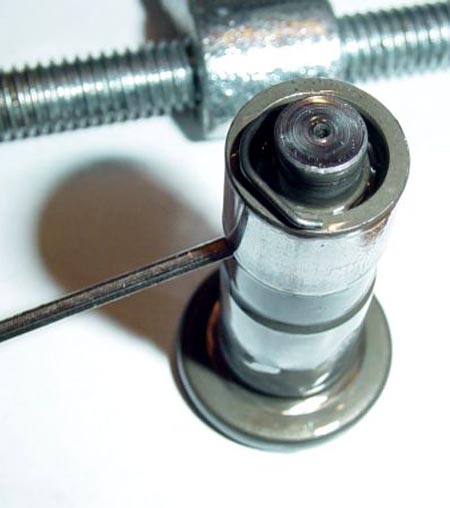
With the Allen wrench in place, release the c-clamp and remove the lifter. Using a dental pick or toothpick, carefully pry out the c-clip from the top of the lifter. Be careful, it can spring out.
-
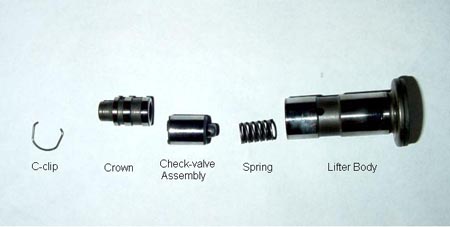
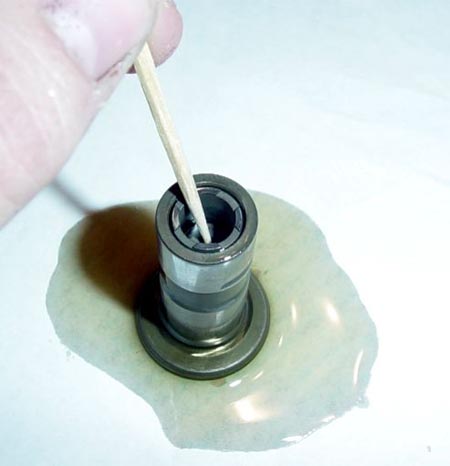
Disassemble the lifter: The crown should pull right out. The check valve assembly is a bit more stubborn. Insert a toothpick into the center and push the ball bearing down, then lever it out and remove the spring. You should have parts as shown:
- Clean all components thoroughly. Soak in Castrol’s Super Degreaser for ~30 min (or use lacquer thinner). The lifter should be grey when clean.
- Test the check valve: Hold upright and pour lacquer thinner in. If it leaks, the valve is still dirty or bad. Clean more or replace if needed.
- Once verified clean and functional, begin reassembly.
-
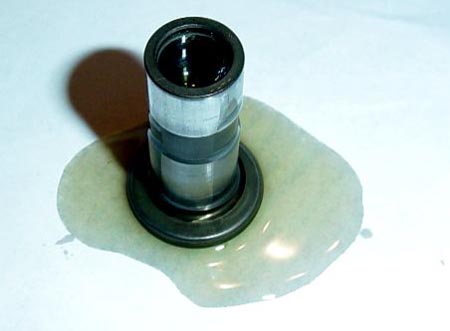
Fill the lifter body halfway with 30W engine oil (or synthetic 50W for high-temp use).
-
Install the spring, then the check valve assembly. Use a toothpick to depress the ball bearing and push the valve fully in. Do this slowly to avoid squirting oil.
-
Install the crown and coat the top lightly with oil.
-
Use the c-clamp again to compress the lifter, insert the Allen wrench, then remove the clamp.
-
Reinstall the c-clip. Lay one side in the groove and use a knife or small screwdriver to snap the other side in.
That's it; you're done! Finish all other lifters in the vehicle and reassemble the engine. When you start the car, hold the idle at 1500 rpm for about 5 minutes to bleed the lifters.
Sources Used
- 1984-1988 Nissan 300ZX Factory Service Manual
- Writen by: Redare