


Z31 Hybrid VLSD Install
Here is the write-up for equipping your Z31 with a Viscous Limited Slip Differential using hybrid half shafts written by Z31performance forum member Mike_Gruizinga. This write-up describes five ways for the budget-minded DIY’er to build hybrid half shafts to fit the Z31. The write-up consists of two basic parts. One part gives information on swapping the VLSD carrier into the R200 Long-Nose differential housing. The other part gives information on assembling the hybrid half shafts needed to complete the installation. I recommend reading the entire write-up before even thinking about starting this swap.
*WARNING* - Do this modification at your own risk. We Are not responsable for any issues of your own doing.
Addendums
- If the hybrid axles are made using methods 1, 4, or 5, they will be a bit longer than the original Z31 axles and a very tight fit. This is due to the additional length from the inner CV joints and VLSD input shafts. There are a couple ways to help fix this problem. The first two options are good, but I highly suggest the third option if you want the job done right.
- If you are using T-T axles, cut down the positioning springs at the ends of the joints.
- If you are using BDO axles, turn the outer races of the CV joint around.
-
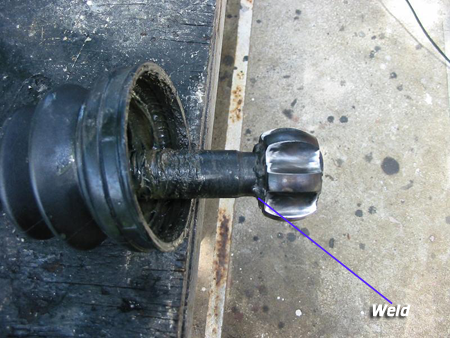
Using either CV joint, bring the inner race (BDO) or spider assembly (T-T) about 1.5 inches closer to the center of the shaft and weld it into place, making 100% sure that the moved item is centered on the shaft.
It is a good idea to chamfer the welding areas to get deep, strong, and clean welds. Cut the remaining shaft material from the end.
This will require delicate grinding and welding, but it can be done correctly and effectively. I did mine with an angle grinder and a MIG welder.
PART I
Since most R200V differentials are short-nosed (unless you have the '88SS R200V), you will need to swap their internals into your Z31 long-nose housing.
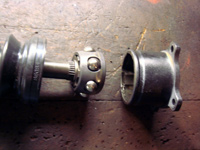
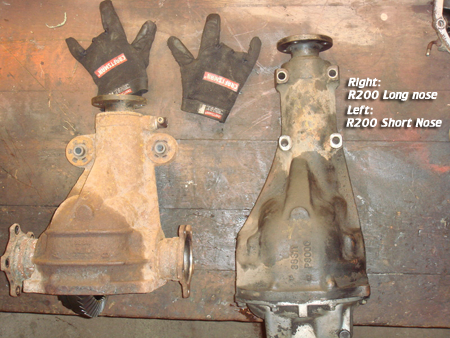 Short-nose vs. long-nose case
The process of swapping the VLSD carrier into the Z31 housing is simple and has been outlined before. Bemis’ webpage has some excellent information on this swap: zrelated.com/VLSD.htm
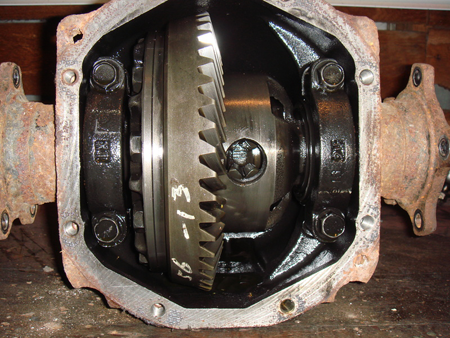
Follow your FSM for removal and installation procedures. The swap consists of installing your Z31 ring gear onto the VLSD carrier and then installing the VLSD carrier into your differential housing. Be sure to get the differential shimmed correctly—getting it wrong means noise and excessive wear. If you don’t know what you’re doing, take the differential to a qualified driveline shop.
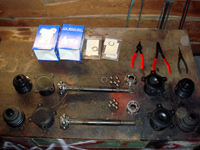
I decided to disassemble everything and clean before reassembly. New gaskets and seals were installed where necessary. Here are a few pictures of the process:
Assembling the Differential
I decided to shim my VLSD while I had it apart. I installed one extra standard (0.80mm) size shim. Here is a list of the available shim sizes. Each costs about $6.00:
 VLSD Shims
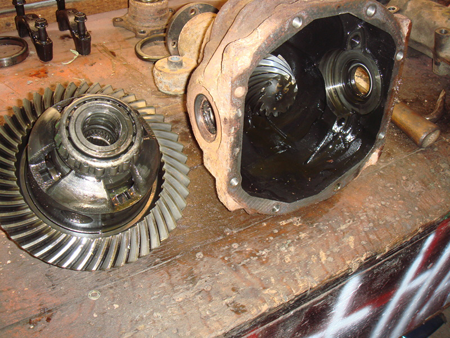
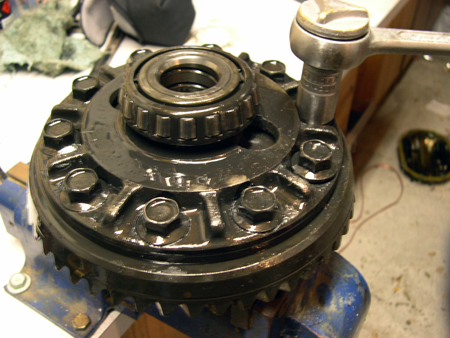
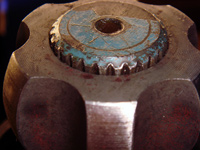
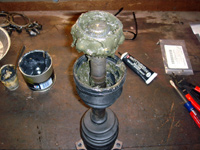
There are several (about 10) large bolts holding the crown wheel on. To remove these I'd recommend a decent vice and large prybar, or an air gun will work as well.
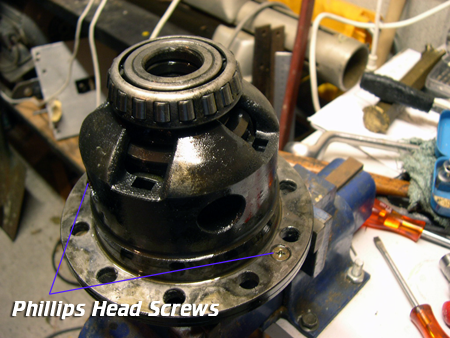
Once the crownwheel is off, you will see two large Phillips head screws. Remove these and off comes the viscous center.
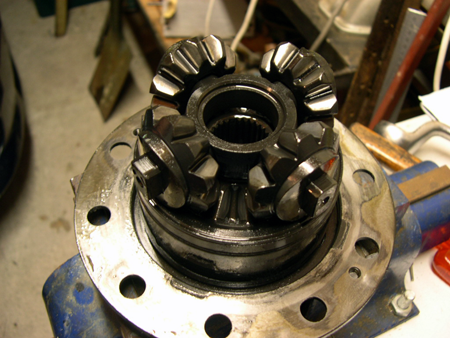
Pry the two pieces apart (where you have unscrewed) and you'll end up with this:
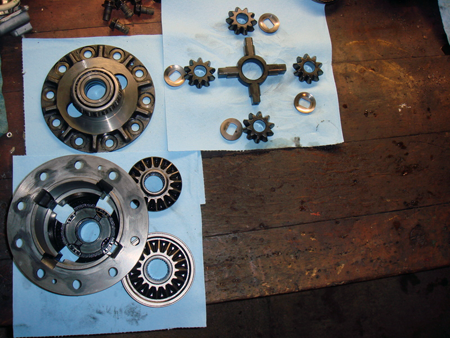
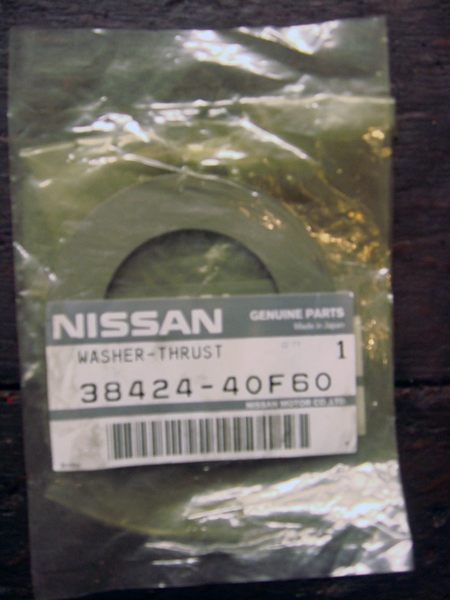
Now pull apart and you will see a washer sitting on a flat surface. That's your original preload shim. See below for a rough indication of what it looks like in new form.
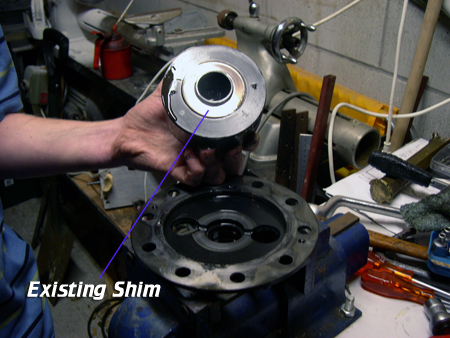
See below for a rough indication of what it looks like in new form.
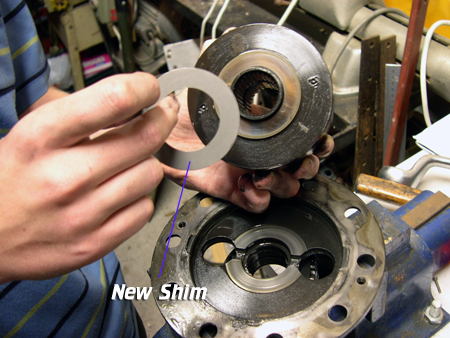
The original plan was to double the shim thickness and put more load on the viscous center, 'reviving' it to how an LSD should be. If you're like me, 1 extra shim just isn't enough for drifting (it is great for everyday driving, however). So go on, be a devil and add 2 extra ones if it's mainly for drifting.
- Add 1 new shim to the existing one (total of 2) for a decent, predictable LSD for driving that spins up both wheels with ease—comparable to a brand new viscous diff.
- Add 2 extra preload shims to the existing one (total of 3) for a very solid diff that's very tight but not quite locked (comparable to a Kaaz 1.5 way mechanical LSD).
This splines the two different splined parts of the diff center together so that when you go to insert the diff stubs at the end, they'll actually fit (easiest way to explain it).
Also, pour new diff oil back in before you put the backing plate on. Hopefully the gasket is still good—if not, use some high temp silicone to seal it before you bolt it up so it doesn't leak everywhere.
More info on how that turned out at the end of this write-up.
PART II
Assembling Hybrid Half Shafts
Let’s start with some basic information.
Z31 NA cars came with Tripod-Tripod half shafts, 6-bolt axle stub companion flanges, and an open differential with either a 3.7:1 ratio (’84–’87) or a 3.9:1 ratio (’88–’89).
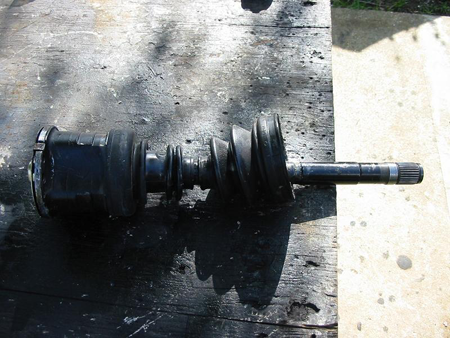
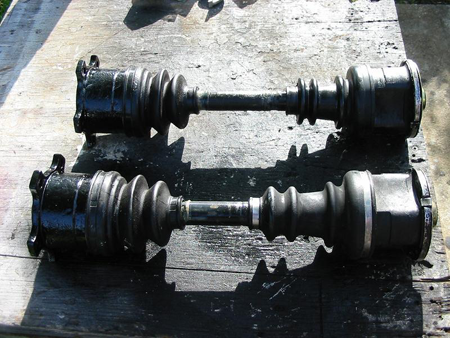
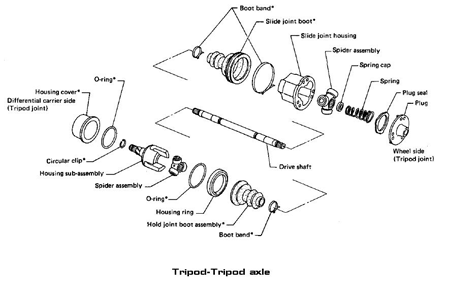 Tripod-Tripod half shaft (Z31 NA)
Z31 Turbo cars came equipped with Birfield-Double Offset (BDO) half shafts, 4-bolt axle stub companion flanges, and either:
- Open differential (’84–’86) with 3.54:1 ratio
- Clutch type LSD with 3.7:1 ratio (’87–’89)
- Viscous type LSD with 3.7:1 ratio (’88SS edition)
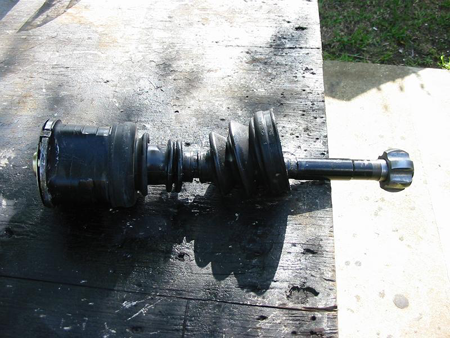
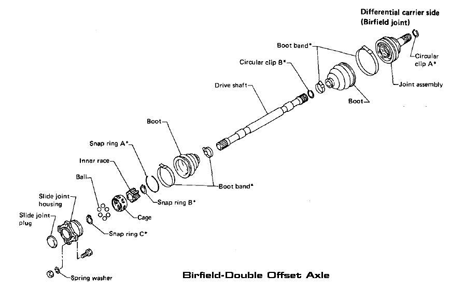 Birfield-Double Offset (BDO) half shaft (Z31 Turbo)
’92 to Early ’94 J30s: Birfield-Double Offset (BDO) half shafts, 5-bolt flanges, and VLSD with a 3.916 ratio.
Late ’94 to ’96 J30s: Tripod-Tripod half shafts, 6-bolt flanges, and VLSD with a 3.916 ratio.
The R200V (VLSD) can also be found in NA Z32s, ’97–’01 Q45s, and some 240SXs. (Half shafts and ratios for these applications can be found in their respective FSMs.)
There are several ways to make your own hybrid VLSD half shafts. Due to time and cost constraints, I could only attempt one way. Lucky for you, fellow Z31performance members 88SinZ and Bemis shared information on their methods. A big thank you to 88SinZ for Method 1, and to Bemis for Methods 2–4.
Method 1
The first way is to combine the Z31 NA half shafts and the Late '94–'96 J30 half shafts. The diff side CV is removed from the J30 half shaft and installed onto the diff side of the Z31 half shaft. Both Bemis and 88SinZ have completed this method. While 88SinZ has successfully installed these into his '88 NA rear end, he suggests using ’84–’86 companion flanges (10mm shorter) for a bit of additional room.
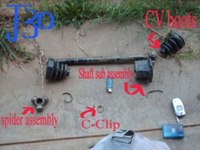
J30 Tripod Shaft Disassembly
- Remove retaining covers — save cap and spring(s).
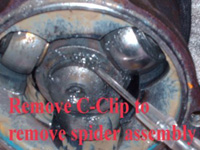
- Remove C-clip from passenger side of J30 shaft (the right tool really helps).
- Remove spider assembly (wrap a hammer in a towel or use a rubber mallet).
- Remove diff side boots and housing sub-assemblies.
Z31 Tripod Shafts
- Snip & remove diff side CV boot.
- Slide the sub-assembly away from the spider assembly.
- Remove C-clip from diff side of shaft.
- Remove spider assembly.
The Tripod Hybrid – Reassembly
- Slide J30's diff side sub-assembly onto the Z31 shaft.
- Reconnect boot, reclamp.
- Re-install spider assembly.
- Re-install C-clip.
- Pack with grease.
- Re-install cap and spring.
- Enjoy your LSD!
Method 2
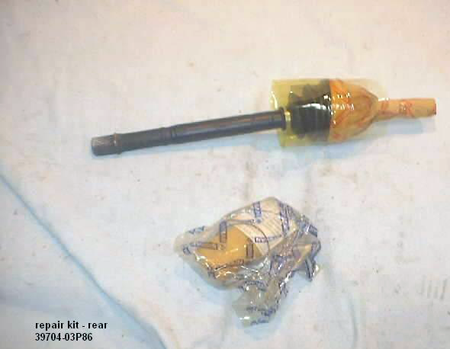
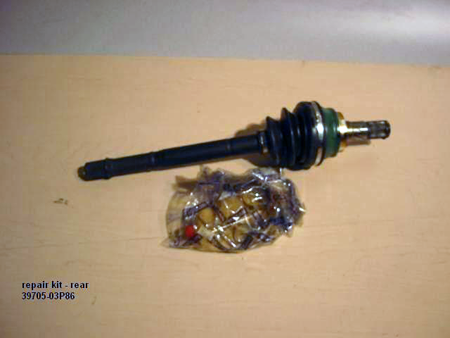
The second way to make hybrid axles is to use the 1988 SS VLSD axle rebuild kits offered from Nissan. There are two rebuild axles, one for each side. These are no longer available (NLA) from Nissan, but that doesn't mean they aren't sitting in some warehouse collecting dust.
These hybrid axles are made by using Z31 turbo BDO axles. All you need to do is remove the existing outer CV joint on the original axle and fit it onto the 1988 SS rebuild axles. Now you have VLSD axles.
Method 3
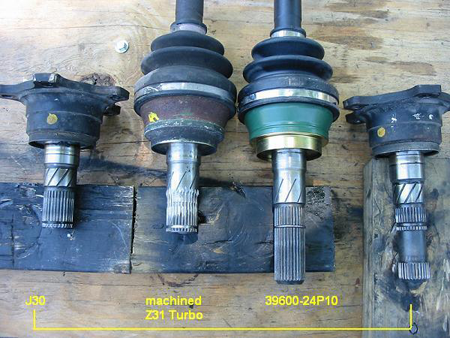
The third way to make hybrid VLSD axles for the Z31 is to purchase the original VLSD axle with the longer spline design, then have an original Z31 turbo axle machined to match the shorter spline design. It has to be done this way because you can always take away metal, but you can’t add it. The original SS axles are no longer available (NLA) from Nissan, so good hunting!
Method 4
The fourth way to make hybrid VLSD axles—this being the most determined and bold method—is to once again use Z31 and J30 axles.
Let’s say you have an original NA Z31 (with T-T axles and 3x2 bolt hub companion flanges), and you get a J30 VLSD with BDO axles. Technically, to make this work, you’d need Z31 turbo half shafts and 4-bolt hub companion flanges. But, if you can’t find any 4-bolt hub flanges locally and don’t want to swap, you can marry the two axles together:
Remove the inner CV joint from the Z31 NA half shaft and join the inner J30 CV joint on the axle—by welding the inner race onto the shaft. Move the inner race about 1.5 inches closer to the center of the shaft to compensate for the length added by the J30 input shaft.
Now you have a VLSD hybrid axle that bolts up to the Z31 NA hub companion flange and connects to the 5-bolt input shaft of the J30 VLSD.
Method 5
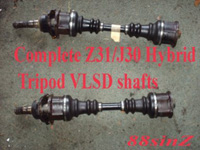
The fifth way is to combine the Z31 Turbo half shafts (BDO type) and the '92–early '94 J30 half shafts (BDO type). Once again, the diff side CV is removed from the J30 half shaft, and installed onto the diff side of the Z31 half shaft.
This is the method I chose for my hybrid half shaft assembly. My VLSD was pulled from a '93 J30, but I have an '87 NA2T, meaning I needed Z31 Turbo half shafts and 4-bolt axle stub companion flanges. Note: it would have been easier to use the late '94–96 J30 half shafts and follow method 1, but I made do with what I could get.
Parts List (for my application)
- 1993 J30 Differential
- 1993 J30 Half shafts
- 1984 300ZX Turbo half shafts
- 1984 300ZX Turbo Companion flanges
- CV boots (Z31 and J30)
- CV clamps
- Valvoline Synthetic CV grease
- VLSD Shim / Part #38424-40F60 (.80mm)
- 1987 300ZX Differential seals (all seals/gaskets)
Specialty Tools
- Big 3/4” impact + Air
- Slide hammer / axle stub puller
- Stop ring pliers
- Dial Indicator
- Vernier Calipers
The Process
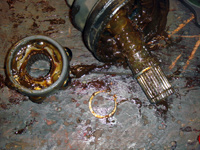
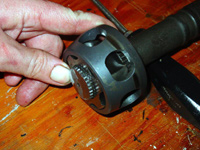
Here’s a look at the types of retaining rings you’ll run into with BDO half shafts:

On the left is a stop ring (retains the inner race from sliding inward, best removed with stop ring pliers). The big ring in the middle retains the slide joint housing. The small middle ring is a compression ring (retains the stock Z31 turbo inner CV). The ring on the right is a snap ring (retains the Z31 turbo outer CV and the J30 inner CV from sliding off the half shaft; best removed with snap ring pliers).

Disassemble the diff side CV of the Z31 half shaft: BDO half shafts are simple. First remove the CV boot and clean off all the grease. The diff side CV is held on by a compression style ring. Knock the CV solidly on its inner race with a big hammer. This compresses the ring and allows the CV to slide off the shaft’s splines.
While you’re at it: Remove the wheel side CV for cleaning and greasing. In the end, you’ll need to turn the cage around to shorten the shaft—this is shown later.
J30 diff side: Remove the CV boot and clean the grease. Remove the big snap ring from the slide joint housing with a screwdriver, slide the slide joint housing off, and then remove the snap ring from the splined shaft with snap ring pliers. Slide the cage/ball/race assembly off. Remove the stop ring with the correct pliers.
Assembly: Slide the J30 diff side cage/ball/race assembly onto the diff side of the Z31 half shaft and reassemble everything. BUT WAIT! The outer snap ring groove will not be visible!
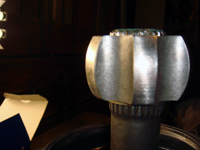
Solution: Mill new snap ring grooves into your Z31 half shaft (anyone with a 3 jaw lathe can do this). My neighbor helped. The stock shaft is on top; the newly milled shaft is on the bottom:
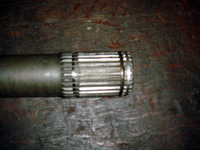
Once machining is done: Install the J30 boot, stop ring, cage, inner race, and snap ring onto your newly milled shaft (diff side).

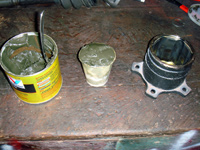
Pack with grease: The Z31 housing (right) takes 4–6 oz; the J30 housing (left) takes 6–8 oz. A Dixie cup holds 5 oz. Test fit axles before filling with grease!
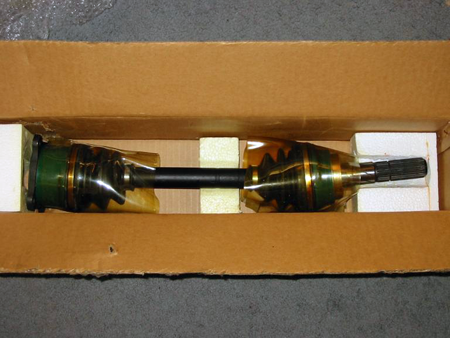
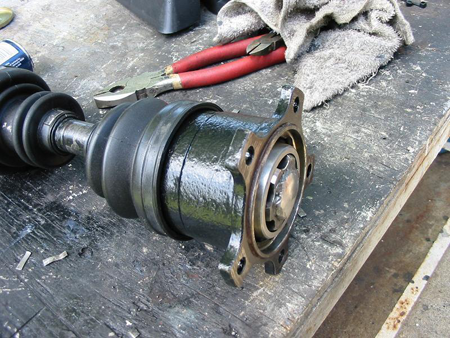
Assemble both CV joints onto the half shaft. (The pictures below show the cage in the OEM position.)
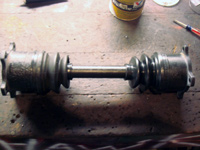
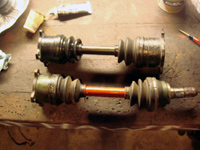
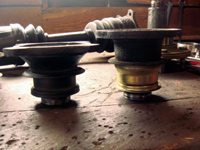
Install the half shafts into the rear subframe assembly. This may take a few tries to figure out what works. Besides turning the cages around, note the difference in companion flange lengths:
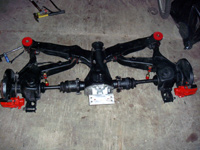
As you can see, 87–89 companion flanges are 10mm longer than 84–86 flanges. I used the 84–86 flanges for my setup to provide the needed room for the hybrid half shafts. Even with the extra 10mm, the shafts were a tight fit!
Results
After a few weeks of testing this setup, I am very happy with the results. Having a limited slip differential makes the car a whole different machine. It’s much more predictable in hard cornering situations and hooks up much better under hard acceleration.
- Differential noise: Between 45 and 55 MPH a howling sound resonates through the cabin. I attribute this to my backlash setting between the pinion and ring gears. I set the backlash to .009” (FSM recommends .005”–.007”). New polyurethane crossmember bushings and diff mount may also contribute. After some break-in, the diff has quieted down a bit.
- Shimmed viscous unit: I installed an extra standard-sized (.80mm) shim. At first, the diff was very tight—wheel hop and clunking on sharp corners. After some drag strip runs and more abuse, it loosened up. No more hop/clunks and it remains quick to lock up—actually very predictable.
Overall, I am very happy with the results of this swap.
I believe these methods are among the cheapest and best for attaining LSD capabilities in a Z31. By using junkyard parts, I performed this swap for less than $125.
Sources Used
- 1984-1988 Nissan 300ZX Factory Service Manual
- Provided by: Mike Gruizinga
- Method 1 images by: 88sinZ
- Bemis Provided the information and images for the VLSD shim install, and the pictures and description for methods 2-4. He also wrote the addendums section.