


Z31 Boost Controler Install
Boost controllers for the Z31 come in many shapes and sizes but predominantly there are two categories, electronic and manual. The advantages of electronic come from a faster spool up time and more consistent boosting with less spikes, but this comes at a cost of 3-4 times the price of a manual controller. *WARNING* - Do this modification at your own risk. We Are not responsable for any issues of your own doing.

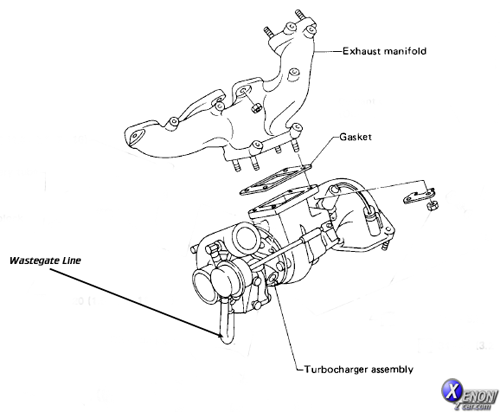
Essentially both work in the same way, by modifying the air pressure delivered to the wastegate of the turbo and hence causing it to open at a higher boost pressure than it otherwise would. Manual controllers do this by creating a restriction in the pressure feed to the waste gate, electronic controllers electronically open and close the air flow to the waste gate.
The installation of the boost regulating aspect is covered in this technical write up as it would be the same for either a manual or an automatic boost controller. We will not cover the electronic side of the installation as each manufacturer's wiring is somewhat different.
If you install a boost controller you will also need to modify the pressure relief valve on the front passenger side of the intake manifold (more on this to follow) or you will not be able to boost past 8-9PSI. You probably don't want to run much more than 10-11PSI of boost for fear of detonation. Use a good boost gauge to ensure you're getting a consistent boost in the range you want and also listen closely for detonation or pinging, if you hear it turn the boost down or risk severe engine damage.
Parts Needed
- Boost controller of choice
- 4&6mm vacuum hose (if not supplied or too short)
- Hose clamps
- (Electrical connectors for an electronic boost controller)
Tools Needed
- Long needle nosed pliers both straight end and bent end
- Small internal ratcheting wrench 8mm or 10 mm
Procedure
-
Open the hood and locate the wastegate from above. It’s a brass-colored cylinder located almost directly under the A/C compressor.
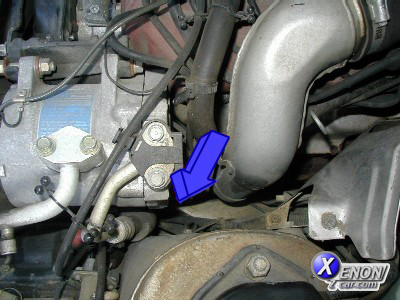
-
From the Factory Service Manual page, Nissan conveniently located the wastegate hoses facing downward. Fortunately, both ends are close together.
-
Use needle-nose pliers to loosen the hose clamps and remove the J-shaped hose at the bottom of the wastegate.
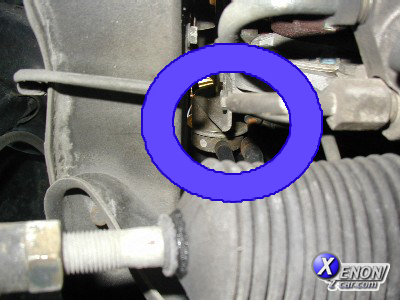
Reach the line from under the car
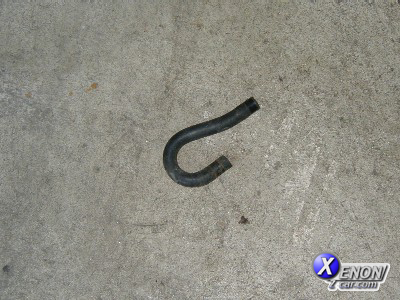
Line removed
- Your boost controller will have at least two connections: one from the pressure source and one to the wastegate. Connect these to the locations where the J-shaped hose was removed.
- Electronic controllers also need a source of manifold pressure. Insert a T-fitting into the vacuum hose going to the fuel pressure regulator and run a line to the controller/stepper motor.
- Once everything is connected, start the car and check for any boost or vacuum leaks. Use a boost gauge to fine-tune the controller — never adjust without knowing PSI output.
- To modify the pressure relief valve on the front passenger side of the intake manifold, stiffen the spring, replace it with the non-turbo plug, or use an aftermarket relief valve based on your desired boost level.
Hope this helps with Boost controlers and the installation of one.
Sources Used
- 1984-1989 Nissan Factory Service Manual
- Boost Control Diagram Picture from: Bob Sharp Z Car Club