


Z31 Fog Lamp modification
This mod allows the fog lights to work independently from the headlights. It utilizes the stock fog light switch, but now the fogs will work with the parking lights instead of the headlights and stay on with the high beam. It is a fairly simple and straightforward modification.
Locating the Relay
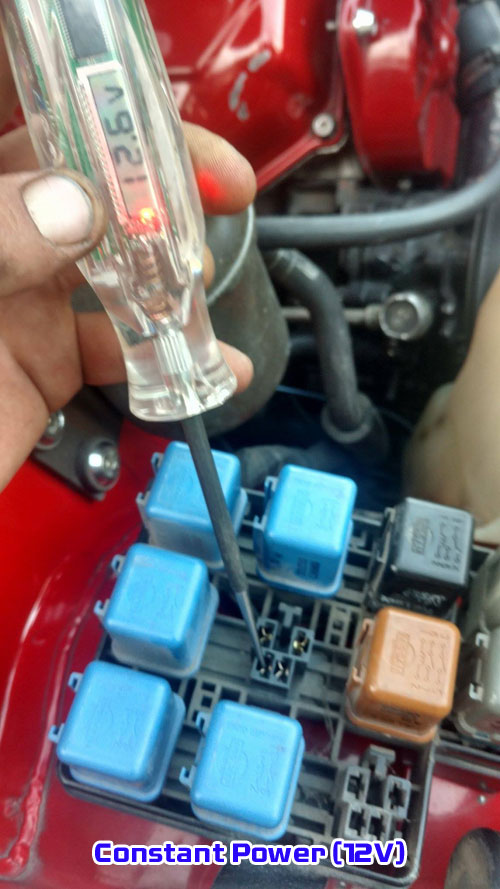
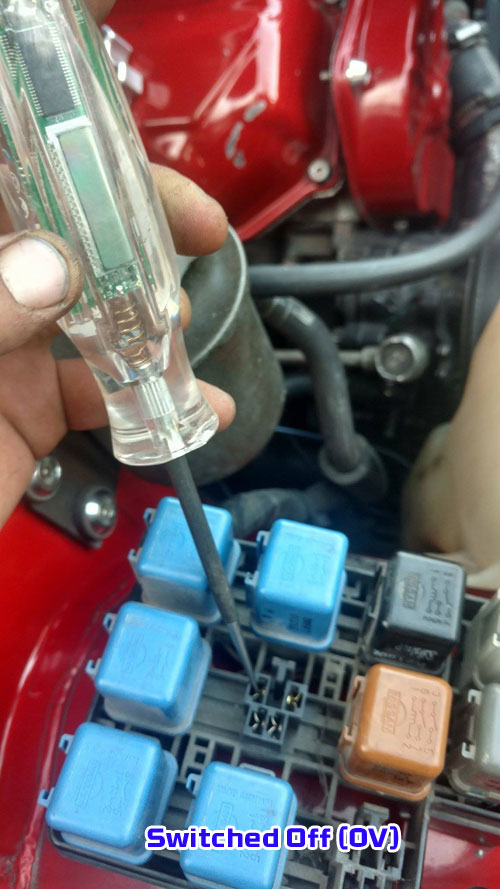
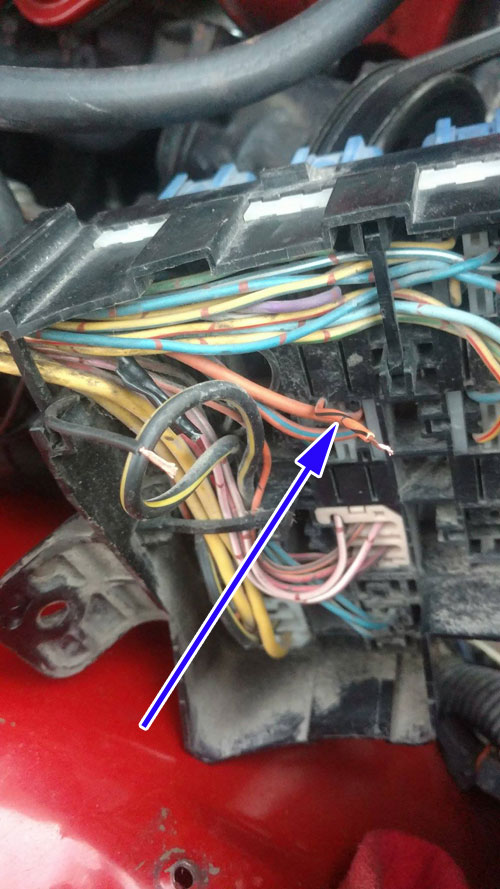
The first step is to locate the fog light relay and determine which wire is the trigger wire. The Fog Lamp relays are located in the relay block under the hood.
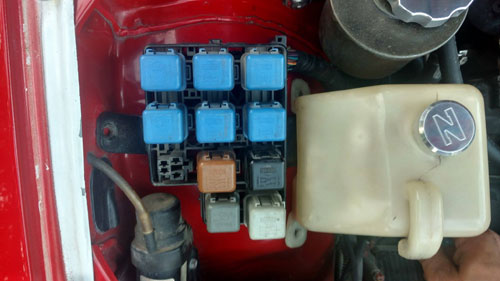
One should be constant power and the other should be switched power when the headlights are on or off.

Access and Cut the Trigger Wire
Now, get under the relay box where all the wires are. Remove the screws holding the coolant overflow and move it out of the way to access the relay box. Once the relay box is unbolted, flip it over and find the switched wire for the fog light relay. It should be a smaller orange wire with a black stripe.

Cut the trigger wire and tape off the end to prevent any sparks or shorts from happening. Make sure to leave enough wire on the fuse box side to tap into. Here you can see the orange with black stripe wire cut, one end taped off and the end of the new power wire:
Run the New Power Wire
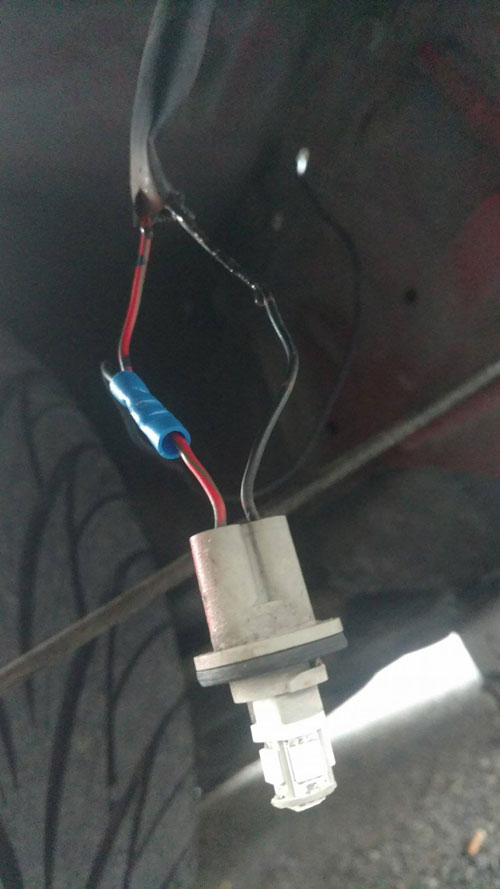
Run a single wire from the fuse box out of the engine bay and into the passenger front fender/wheel well area. In the passenger fender, access the marker light connector and wires: two wires — red for power and black for ground. The new power source for the switch side of the relay will come from the red wire here. Use a wire tap or cut the red power wire and use a butt connector to rejoin them.
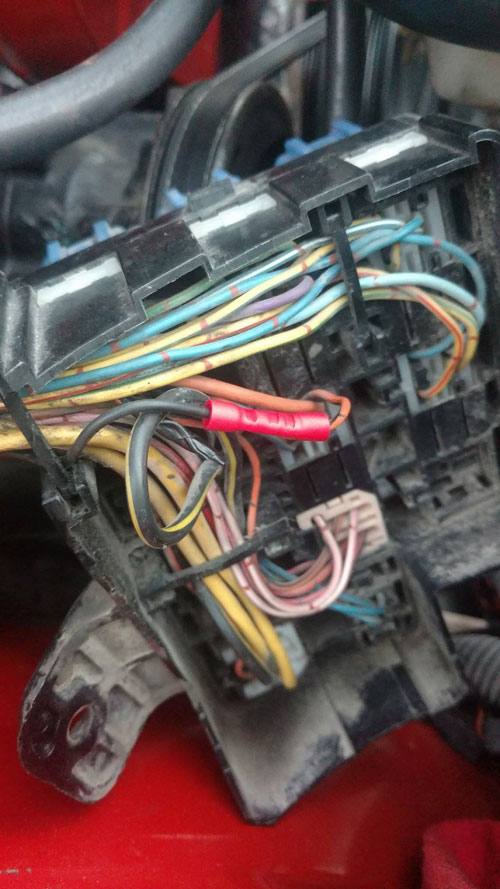
Once the wire has been run and spliced into the power side of the marker light, connect the new wire to the old wire in the relay box.
Testing and Final Steps
At this point, you can put the relay back in and test it out. The fog lights should work without needing the headlights on and you should still be able to turn them on and off with the stock switch. Once everything is tested and working, reassemble the relay box and coolant overflow bottle.
Additional Photos & Clean Install
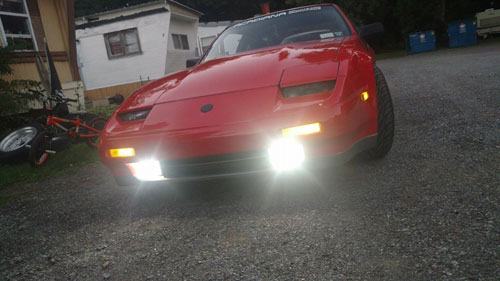
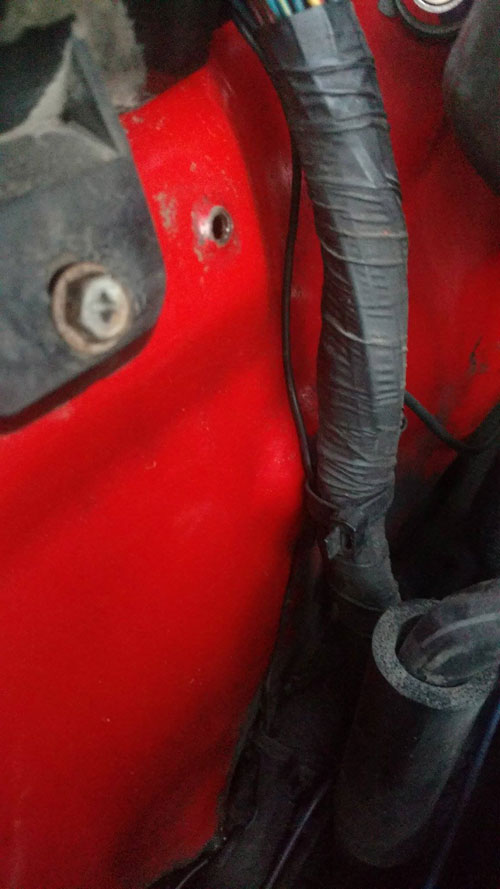
Here are additional pictures showing how and where the wire was routed. You can run it however you prefer, but this method is not even noticeable and keeps the installation clean. The last image shows the result with the lights on.
Sources Used
- Written by: Keif Potter