


Removing the Dash in your 280ZX

Removing the dash to get to the heater vents or wiring can look like a daunting task, but it’s really not that hard to do. With the steps outlined below, you should have it out within two hours.
*WARNING* - Do this diagnosis/mods at your own risk. We Are not responsable for any issues of your own doing.
Tools Needed
- Steering wheel puller (optional)
- #2 (large tip) Phillips screwdriver
- Large metric socket to fit shaft nut on steering wheel
- Basic metric socket and ratchet set
Removal Process
-
Remove kick panels in both footwells. Store panels and screws. Remove trim around radio and A/C center vents, storing all screws and trim pieces.
- Protect the center console with a shop rag to avoid scratching it during the next step.
-
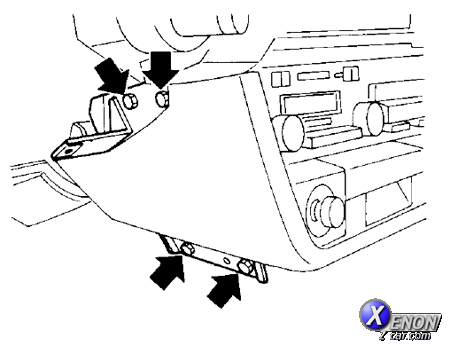
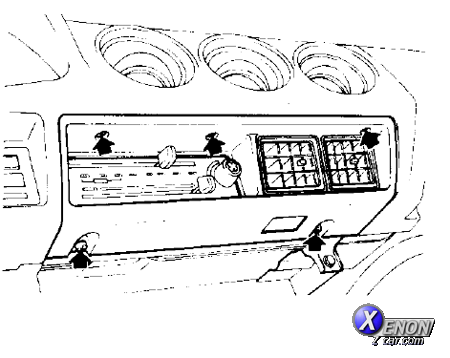
Remove radio console completely. Start with the small triangular panels on the lower sides of the radio console (1 screw each), then remove four bolts on each side — two top, two bottom. Loosen with a ratchet, then use a #2 Phillips screwdriver to remove them. Unclip all electrical and antenna connections.
- Lift out radio console and store it safely.
-
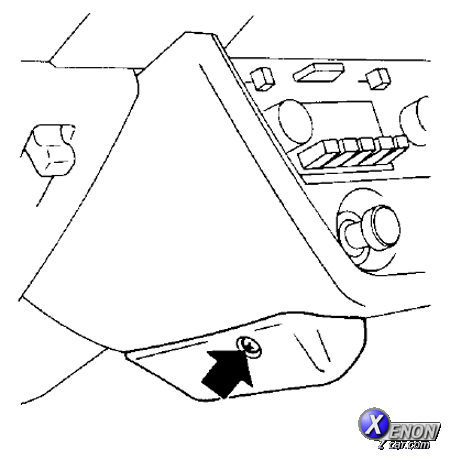
Look under the A/C control box to find two screws securing the dash to the console. Remove these with a stubby Phillips screwdriver and store them.
- Remove glove box door and inner box. Store the screws.
-
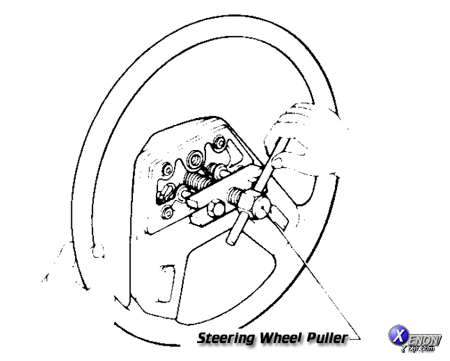
Remove the steering wheel (disconnect the battery first). Remove two screws on the back side of the wheel, pop off the center cap, disconnect the horn wire, mark wheel and shaft alignment, loosen the nut (but leave it on), attach a steering wheel puller, and remove the wheel.
NOTE: You can also loosen the bolts under the dash that hold the column and remove the dash without pulling the wheel.
- Remove upper and lower plastic steering wheel trim from the column. All screws are standard Phillips head.
- Disconnect the turn signal assembly wiring and loosen its clamp screw. Gently pull it outward until you can drop it down out of the way.
- Disconnect the speedometer cable at the center housing under the dash (usually hand-tight).
- Remove all electrical connectors from the dash. All are on the passenger side above the footwell and are color-coded.
-
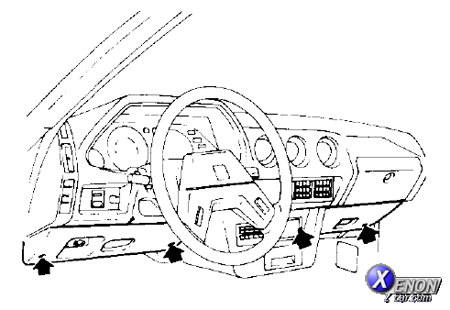
Remove four flat plastic plugs on top of the dash to expose the top screws. Leave these screws until last.
- Remove four large screws across the bottom of the dash — two near the radio console and two outboard.
- Remove the four screws across the top of the dash. Double-check electricals and speedometer cable before pulling.
- Wiggle the dash, lift slightly, and pull toward you. It will come free when lifted from the support notches on the lower brackets.
Dash Re-Installation Notes
To re-install the dash, follow the removal steps in reverse — but be careful to locate the speedometer cable correctly! There’s a body brace under the dash that the cable can run either above or below. As soon as the dash is in place, check the speedometer cable first. If it’s routed incorrectly, pull the dash back out far enough to correct it before reconnecting everything else.
NOTE: Make sure to align the steering wheel correctly on the splined hub to keep it centered.