



Z31 to Z32 Front Brake Swap
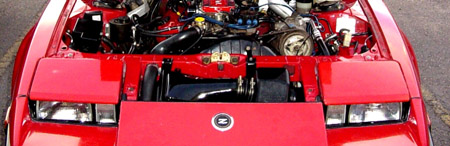
In the early years, Nissan (or perhaps the dealerships) sprayed the under hood compartments of the Z31's with a waxy (almost like contact cement) goo (Cosmoline)that was designed to protect the engine components and other items from corrosion during transportation by boat. Well, after 22 years, that sticky stuff has collected all kinds of dirt and looks absolutely terrible. Because of its waxy nature, it's hard to clean up.

You can increase the stopping power of your front brakes by using the front rotors and calipers from the later 1990–1996 300ZX.
*WARNING* - Do this modification at your own risk. We Are not responsable for any issues of your own doing.
Tools Needed
- Jack
- Jackstands
- Line Wrench
- Ratchet
- 17mm Socket
- Cutoff wheel or Hacksaw
- Punch
- Hammer
- Breaker Bar
- 30mm Axle nut socket
Parts Needed
- 1990 26mm Non turbo front calipers

- 1987 - 1989 Turbo front Hubs
- 1990 - 280mm x 26mm Front rotors
- 0.170" Spacer
Installation
- Jack the front of the car up and secure on jackstands.
- Remove the front wheels.
-
Remove brake caliper and line from the car.

-
On models other than 87+ turbo, remove the front hub assembly and replace with the 87+ turbo front hub.

-
The Z32 caliper is much longer than the Z31 caliper. By cutting an inch or so off the dust shield, the caliper will now fit without rubbing.


- Install the Z32 front rotor by slipping it on the wheel studs.
- Next, install the spacer so the caliper will be centered.
-
Now to modify the caliper so the Z31 brake lines will work.
- First, separate the two halves of the caliper.
-
Then remove the piston in front of the fluid inlet.

-
Once piston is removed this is what you'll see.

- Just take a punch or similar and tap the orifice out from inside out.
- I found it necessary to stick a Phillips in the front of the inlet and turn the orifice to "break" it loose.
-
This is what you are removing.

- Install the caliper and bleed the brakes.
- Install the wheels and lower the car.
Other Information on this swap
This swap is known to work with the 87-89 turbo and non turbo wheels. 1986 Non turbo wheels rub the caliper slightly at the bottom face caused by the hub section of the wheel. At this time it is unknown if the 84-85 Turbo and non turbo and the 1986 turbo wheels will work without rubbing the new caliper.
Sources Used
- 1984-1988 Nissan 300ZX Factory Service Manual
- Written By: Kevin "88Hybrid" Grubbs
- Wheel Fitment by: Jon "Satan" Martin