



Replacing the S30 Exterior Door Handle
After 50 years, the outside door handles on many 240Z, 260Z and 280Z cars are pitted, loose, or no longer open the door. Replacing one means working inside the door, but it's a manageable job once you know where the fasteners are. The hardest parts are getting the window crank off and reaching the rear handle nut.
What You Need
- Window crank clip removal tool (or thin needle-nose pliers)
- Phillips screwdriver
- Door panel clip tool or a wide, flat trim tool
- Small socket set with an extension, and a short wrench
- New handle gaskets (pads) if the old ones are cracked
- Masking tape to protect the paint
The Process
1. Remove the window crank
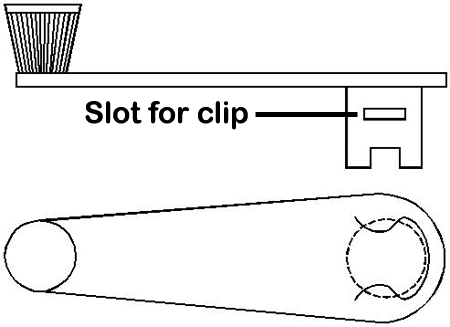
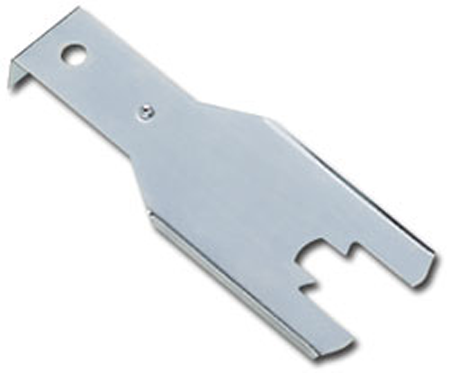
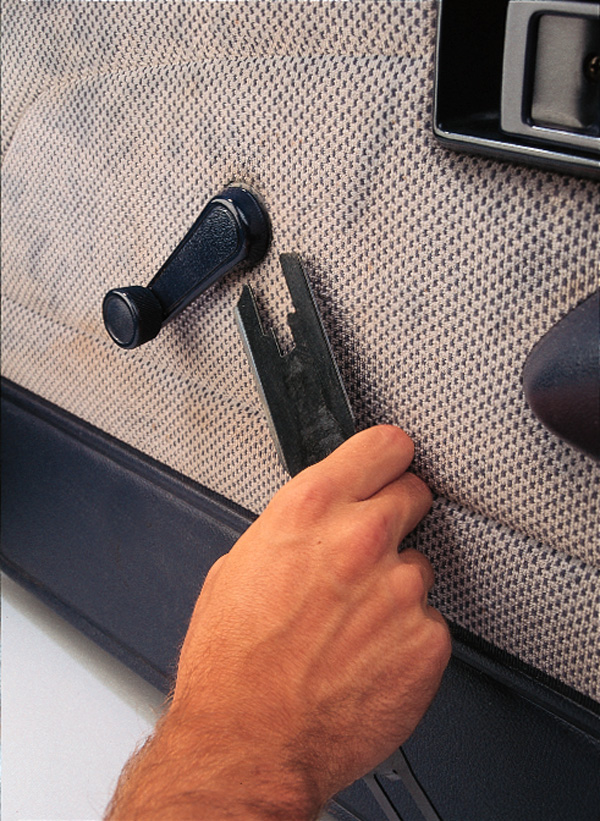
First, wind the window all the way up; that keeps the glass clear of the handle fasteners later. The crank is held on its splined shaft by a wire clip that sits in a slot in the crank's hub, between the crank and the door panel. Press the door panel back slightly, slide the clip tool in behind the crank, and push the clip out of its slot. The crank then pulls straight off. Thin needle-nose pliers can also pull the clip out, but it's easy to lose or bend it.
2. Remove the door panel
- Remove the armrest screws and the armrest.
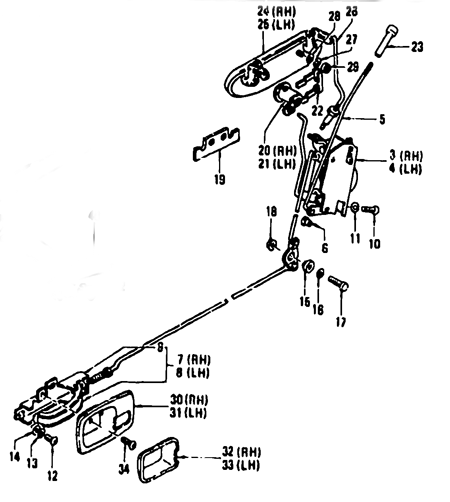
- Remove the screw holding the inside handle bezel, and take the bezel off.
- Pry the door panel away from the door with a clip tool, working around the edges close to each clip so you don't tear the panel board.
- Lift the panel off and carefully peel back the plastic weather sheet behind it. Keep it intact; it keeps water off the panel.
3. Disconnect and remove the handle
- Find the rod from the outside handle to the door latch, and unclip it from the handle. If you're also reusing the key cylinder, disconnect its rod as well.
- Remove the two nuts holding the handle to the door from the inside. The rear one is tight to reach; a short extension or a stubby wrench helps. If the glass is in the way, slip the crank back on temporarily and move the window.
- Pull the handle and its gaskets off the outside of the door. Mask the paint around the handle first so it doesn't get scratched.
4. Install the new handle
- Fit the gaskets and the new handle, and tighten the nuts evenly. Don't overtighten them, or you can crack the gaskets or dent the door skin.
- Reconnect the rod to the latch with its clip.
- Test before you put the panel back: with the door open, the handle should release the latch near the end of its travel, with a little free play first. Adjust the rod if the latch releases too early, too late, or not at all. Then close the door and check it from both inside and outside, and check the lock.
- Reinstall the weather sheet, the door panel, the bezel, the armrest and the window crank.
Sources
- Datsun 240Z, 260Z and 280Z factory service manuals
- Owner tips from the Classic Z Car Club forums